Client ID Look-up <F4>
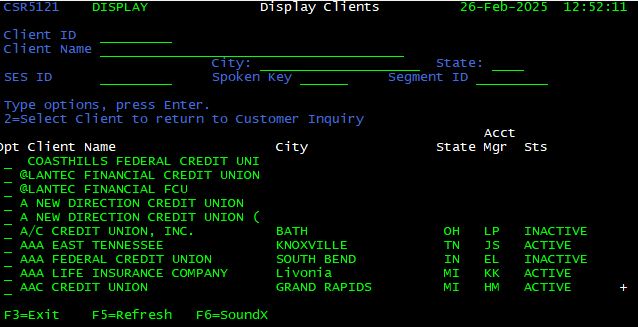
With the cursor in the Client ID field of Customer Service Inquiry screen, press <F4>. The Display Clients screen is shown. Enter the client name and press <Enter> to display search results. Find the desired client in the search results and enter “2” in the box to the left of the client name. Press <Enter> to return the Client ID to the Customer Service Inquiry screen.
Refresh <F5>
Press <F5> to refresh the screen. All user-input data and search results are cleared.
SoundX <F6>
Enter the customer’s first and last name in the appropriate fields of the Customer Service Inquiry screen. Press <Enter> to begin the search. Once the results are displayed, Press <F6> to perform a SoundX search. The SoundX search returns names that sound like the last name entered. This feature does not work well in all cases, but may provide assistance with a difficult last name spelling.
Master File <F14>
The Master File is the central location for client and product information. It is utilized frequently to obtain information about products offered by a financial institution. To access the Master File, hold down the <Shift> key while pressing the <F2> key. You may recognize the Display Clients screen from the <F4> function. The screens are identical; however, Client ID cannot be posted to the Customer Service Inquiry screen from the Master File.
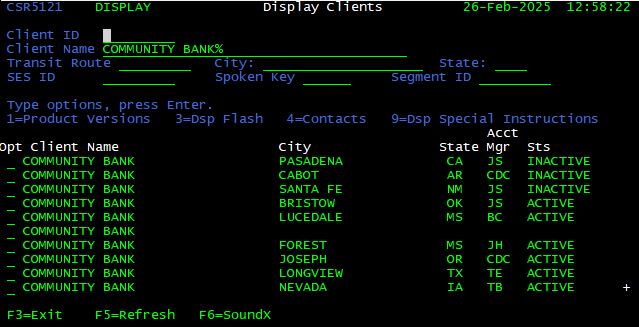
Another option offered in Artemis is the wildcard (%) search. By placing a percentage mark (%) before the search criteria, results are returned in alphabetical order.
Also, place the wildcard (%) symbol after a partial category entry to search for all accounts that contain that specific information.
Example: Instead of searching for “Community Bank & Trust”, use the wildcard (%) feature by typing “Community Bank%”.
Note: The wildcard (%) search can be used in the Customer Service Inquiry or the Master File screen.
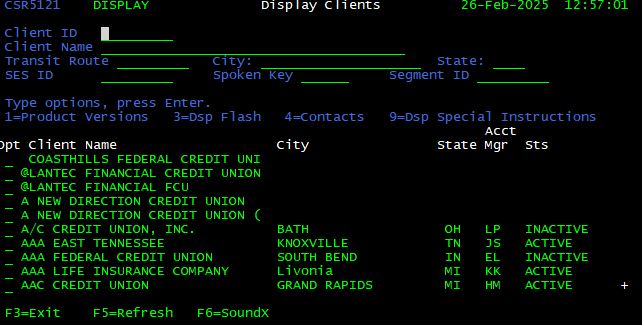
Once the client is located, there are four options which can be applied to a client record:
| Option | Description |
| 1 | Display product information / versions |
| 3 | Display client “Flash” information |
| 4 | Display client contacts (not utilized by contact center) |
| 9 | Display special instructions (not utilized by contact center) |
Product Versions – Option 1
Once the client has been located in the Master File, enter <1> in the option box to the left of the client name to display product information. Press <Enter> to proceed. The Select SES ID screen is displayed.
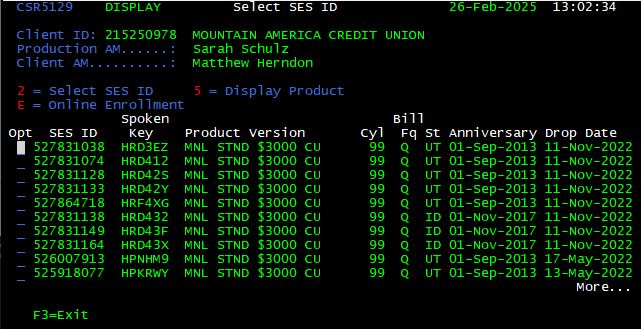
SES – Solicitation Event Segment
A unique identifier for a given solicitation. SES numbers are used by Franklin Madison’s Marketing team to distinguish various marketing initiatives.
Spoken Key
A unique, match-back identifier that corresponds to a given SES number. The Spoken Key is printed above the customer’s name on all solicitation pieces and is critical for enrollment inquiries.
Product Version
A short description of the product.
Cycle
Represents the billing cycle in which each SES will bill.
Billing Frequency
Represents how often each SES will bill.
State
Indicates which state (if state specific SES) the SES was dropped, or “US” for all state in the US.
Anniversary Date
Indicates the date on which the SES becomes effective.
Drop Date
Indicates the date on which the SES was mailed to a given customer base.
From the Select SES ID Screen, there are three options which can be applied to an SES:
| Option | Description |
| 2 | Select SES ID (not utilized by contact center) |
| 5 | Display Product |
| E | Online Enrollment |
Display Product – Option 5
Once the desired SES has been located on the Select SES ID screen, enter <5> in the option box to the left of the SES to display product information. Press <Enter> to proceed. The Display Product Information screen is displayed.
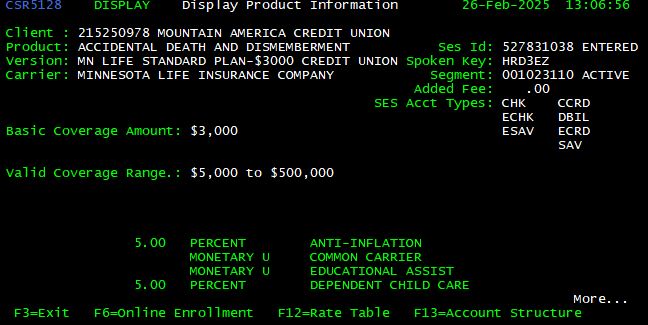
From the Display Product Information Screen, there are three options which can be applied to an SES:
| Option | Description |
| <F6> | Online Enrollment |
| <F12> | Display rate table |
| <F13> | Display account structure |
Enrollment Over the Phone <F6>
The preferred enrollment method for directly mailed products is through the enrollment form. If the customer has an enrollment form, encourage him/her to complete the form and return in the envelope provided. This helps control handle time and allows supplemental coverage to be added as part of enrollment.Occasionally, a customer will need to be enrolled over the phone. We can only enroll complimentary AD&D coverage over the phone.
Scenarios when enrollment is required over the phone are:
- Lost enrollment form
- Customer is closing their account and moving funds to another participating financial institution
- Customer was not solicited, but maintains an account with a participating financial institution
- Customer wishes to avoid receiving mail solicitation
Other products need to be sent an application for enrollment.
Upon successful enrollment, a “complimentary only” coverage record for the customer is immediately generated. If the customer is interested in supplemental coverage, the customer must mail-in their enrollment form.
Transfer caller to a supervisor / Tier II agent for enrollment over the phone.
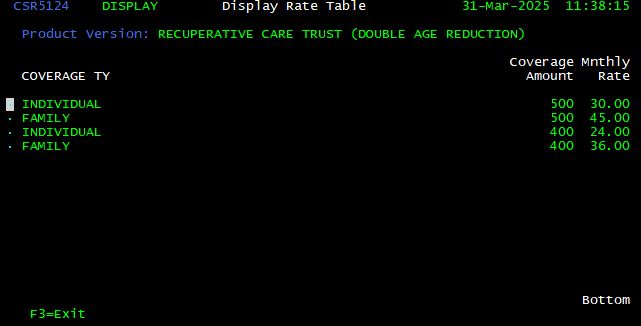
Rate Table <F12>
Once the desired Product Information Screen has been displayed, press <F12> to display rate information for the SES. Rates should only be quoted from this screen, once a Spoken Key (SES) has been provided. Rates should be quoted in approximate only.
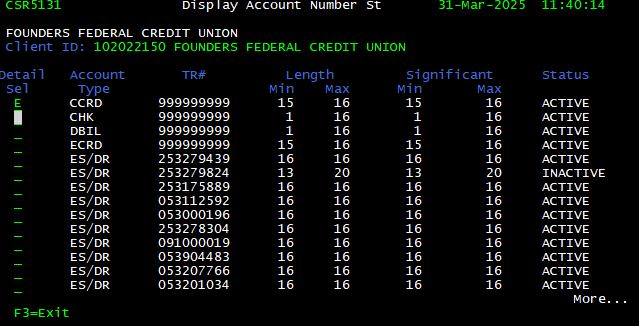
Account Structure <F13>
Once the desired Product Information Screen has been displayed, press <F13> (<Shift> + <F1>) to display account structure for the SES. This is most helpful during online enrollment to determine the proper character length for account numbers for a given transit routing number.
Online Enrollment <E>
Online Enrollment
Once the desired SES has been located on the Select SES ID screen, enter “E” in the option box to the left of the SES number to enroll a customer into a given SES. Enrollment is possible for AD&D only with one exception, mortgage billed customers. Enrollment for Mortgage (MORT) billed coverage is not permitted over the phone because the mortgage company sets up the controls. All other coverage types (HAP, Recuperative Care, etc.) must be entered on a paper form and turned into a Supervisor immediately.
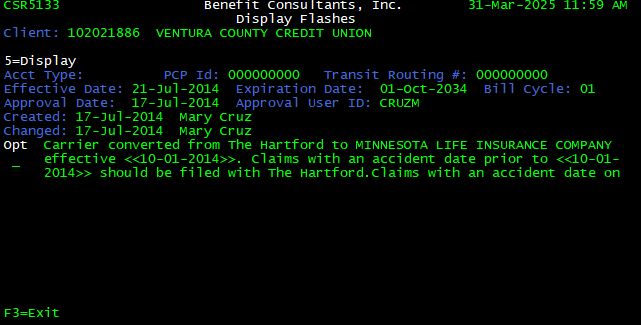
Display Client Flash Information <3>
Flash updates are urgent and pertinent communications pertaining to a given Client ID. The client name will appear red in the Master File if flash information is present.
Flashes expire dependent on the expiration date assigned to them when they are approved. It is up to the user to check the flash message for recent updates, even if he/she has checked the flash before.
Once the desired client has been located in the Master File, enter “3” in the option box to the left of the client name to display any flash information. Press <Enter> to proceed. The Display Flashes screen is shown along with pertinent client updates.
Display Product <F19>
The Display Product feature is a quick method for retrieving specific information about a solicitation (offer) when a customer is not yet enrolled. From the Customer Service Inquiry screen, press <F19> (hold the <Shift> key while pressing the <F7> key).
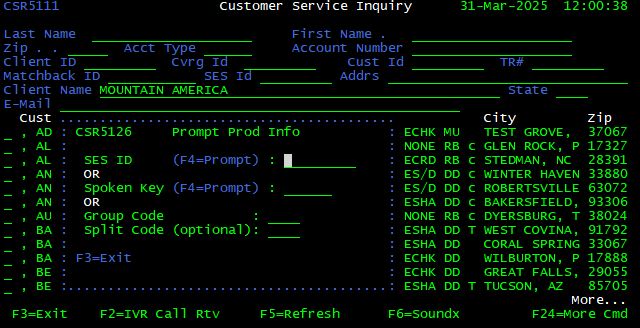
Enter the SES ID or Spoken Key obtained from the customer. Press <Enter> to display product information for the SES. Display Product Information is covered in detail in Section 7.3.2 Master File.
Suppress Mail <F23>
Suppress Mail
Occasionally, callers may ask to be removed from our mailing and/or phone solicitation (telemarketing) lists. In order to remove a customer from either list, press <F23> (press and hold <Shift> while pressing <F11>) from the Customer Service Inquiry screen. The Customer Mailing Suppression screen is displayed.

Enter “T” to remove the customer from phone solicitation, “M” for direct mail or “B” to remove the customer from both. Press <Enter> to process the suppression.
The Client ID can be retrieved by placing the cursor in the Client Org. ID field and pressing <F4>, this is similar to the Client ID Look-up feature described earlier.
To suppress solicitation of an existing customer…